Showing posts with label timber framing. Show all posts

Wednesday, January 3, 2018

Stairs, walls and floors!

We continue to make progress, albeit slowly.  The last month was spent making progress on the laundry room, getting the water heater going (finally!), hanging drywall in the kitchen and getting stairs in.

First, we got the water heater working.  I was elsewhere for this event so it didn't get photographed, but man was that first hot shower at home amazing!  Finishing the vent stack for the water heater also enabled us to finish out the last of the laundry room/coat closet.  We started by hanging the last drywall in that space, then moved on with the usual mud/sand/mud/sand exercise.

First coat of mud
 
  
Power panel ready for paint

We got it primed and painted before the holidays, so I spent the time just before Christmas putting down cement board and laying tile in the laundry.  For anyone not local, we have been in a deep freeze since just before Christmas eve, so getting the tiles cut for this work involved a very cold Jeremy running a tile saw well past dark while I carefully laid out tile and marked cuts.  We ended the evening of the 22nd with all the tiles cut for the laundry and the first couple of rows in the coat closet.  We couldn't keep going - it was just too cold to keep cutting - so the rest of the coat closet will get tiled later.

Cement board ready for tile

We were up early the morning of the 23rd to lay tile before we left town for Wichita.  We were supposed to be there for lunch, so the race was on!  I managed to lay all the tiles we had cut and Jeremy was amazing and cut a couple of re-do's and a couple of extras so we got a little more done than we thought we would.  Here's what it looked like when we left town:


When we got back, I knocked the levelers off so we could walk on it more easily.  There was one tile that didn't stick in one corner that I had to re-lay, but the rest of the floor was solid.  Woo hoo!  I felt pretty good about that for my first attempt at laying tile.  I got the tile grouted the day after Christmas and I think it turned out pretty well!


As my Christmas present to myself, I sealed up the coat closet studs and installed the coat hooks.  I think our family must have 20 different coats and jackets that had been strewn around the house.  It was driving me more than a little bit crazy!  I feel much better now that they all have a home.

You can see the line of unfinished stud at the back

All sealed up and ready for hooks

The coats have a home!

Meanwhile, Jeremy worked on the stairs for most of December.  You saw the rough cut treads in the last post.  Each of them got sanded 3 times, shaped, cut to length, any cracks filled with wood epoxy, sanded again and then Jeremy got to start on the runners and go through all of it again!  Once everything was sanded and test fit, he put 2 coats of tung oil on them and it really brought out the grain and beauty of the douglas fir.  The result is so worth the weeks of work!  We got them installed on the 22nd, although they were held together with pipe clamps.  The treads will get pegged into the runners just like the knee braces everywhere else in the house.  It was so nice to finally fold up the ladder we had been using to get to the second floor!


Treads with wood epoxy drying

Chiseling out tread slots

 Assembling the finished stairs

The craftsman with his creation!

Now we are working on finishing the last of the sanding, mudding and painting downstairs and moving on with tile!  Bit by bit, it is getting there.

Friday, October 27, 2017

Real rooms and lights!

At the end of the last post, we were starting the flooring in the bedrooms.  Since then, we have finished the flooring and trim and gotten the lights and outlets all done for all 3 bedrooms.  Woot!  We are all in our own rooms for the first time in 4 years with actual furniture (not plastic bins and suitcases).  Wow.  So, back to where we left off....

While Scott and I worked on flooring upstairs, Jeremy cut our leftover car siding into trim for the upstairs.  This way it matches the ceilings and the beams and we don't have to buy more stuff.

Stack of trim waiting to be installed


Once the trim was made, he moved on to finishing out the windows.  We used cedar boards milled from trees we cut off of my mother's family farm (where she was born) to finish out the deep window wells and do the window built in shelves in our room.  They are absolutely beautiful thanks to Jeremy's amazing attention to detail.  There is something really special about being able to tell my kids that when their grandmother was a little girl, she probably played around the trees that are now in their windows.  You can read the story of us cutting those trees 5 years ago here:  http://thelehrmans.blogspot.com/2012/11/logging-again.html


Sealing the boards after they were cut to fit.

The first finished window!
 
Cedar under our window waiting for the built in


While Jeremy was busy with that, Scott and I hung the ceiling fans in the bedrooms, finished out the rest of the upstairs electrical and hung the doors.   Doing the trim was somewhat tricky in that our beams are not square thanks to the trees growing on the side of a mountain.  That meant that the trim around every beam and collar tie had to be custom cut which was a very fiddly, tedious process.  The end result is beautiful though!

Doors hung

Finicky trim


They were predicting a very cold couple of nights and we really wanted to get the kids into their rooms and out of the RV before that happened, so we were all in on getting the rooms done.  We just made it!  The kids got to sleep in their own rooms for the first time on the first near freezing night of this fall.  Whew!  Then we started moving the rest of their furniture in and put the finishing touches on Jeremy and I's room. 


Jacob on moving day
 
Our room with actual furniture!

With everyone in a more stable sleeping place, it was time to get the power on to the house.  We had been running our refrigerator and a single lamp off of an extension cord from the outlet in the shed since August.  Now that we had all the circuits upstairs and in the bathroom tied off and ready, we started the process to cut power over to the main house panel.  First, we dug a trench and laid the heavy gauge wire in it inside of electrical conduit.


Trench with conduit starting

Then we killed the power to the power system in the shed - inverter, batteries, everything - to make sure no one got hurt.  Then my amazing brother took care of connecting the wires to the appropriate ports on the inverter and in the house while the rest of us buried the conduit. 


Covered trench and Scott working on the cables in the shed.
Then it was time to flip the switch!  As you can see in the sneak preview above, it worked!  There was much rejoicing that we didn't have to keep wearing head lamps around the house to see.  It was a pretty awesome feeling to get to pull the extension cord out of the house for good!


No more extension cord!!!!
 
Let there be light!

Due to the impending cold weather, getting the place for the wood stove ready to go became the next top priority.  The first step was to finish out the electrical by the front door since we needed to close up that wall.  That involved installing the outside light and outlet.  Scott and I knocked that out in about 2 hours last Wednesday.


Outlet and door light

Inside view of the wood stove corner

Now we are focusing on getting the corner ready for the wood stove.  It is going on a platform which Jeremy is busy building.  One step at a time, we're getting there.  It is starting to feel a lot more like home now though. 


Friday, July 14, 2017

Framing, plumbing and closing in on drywall

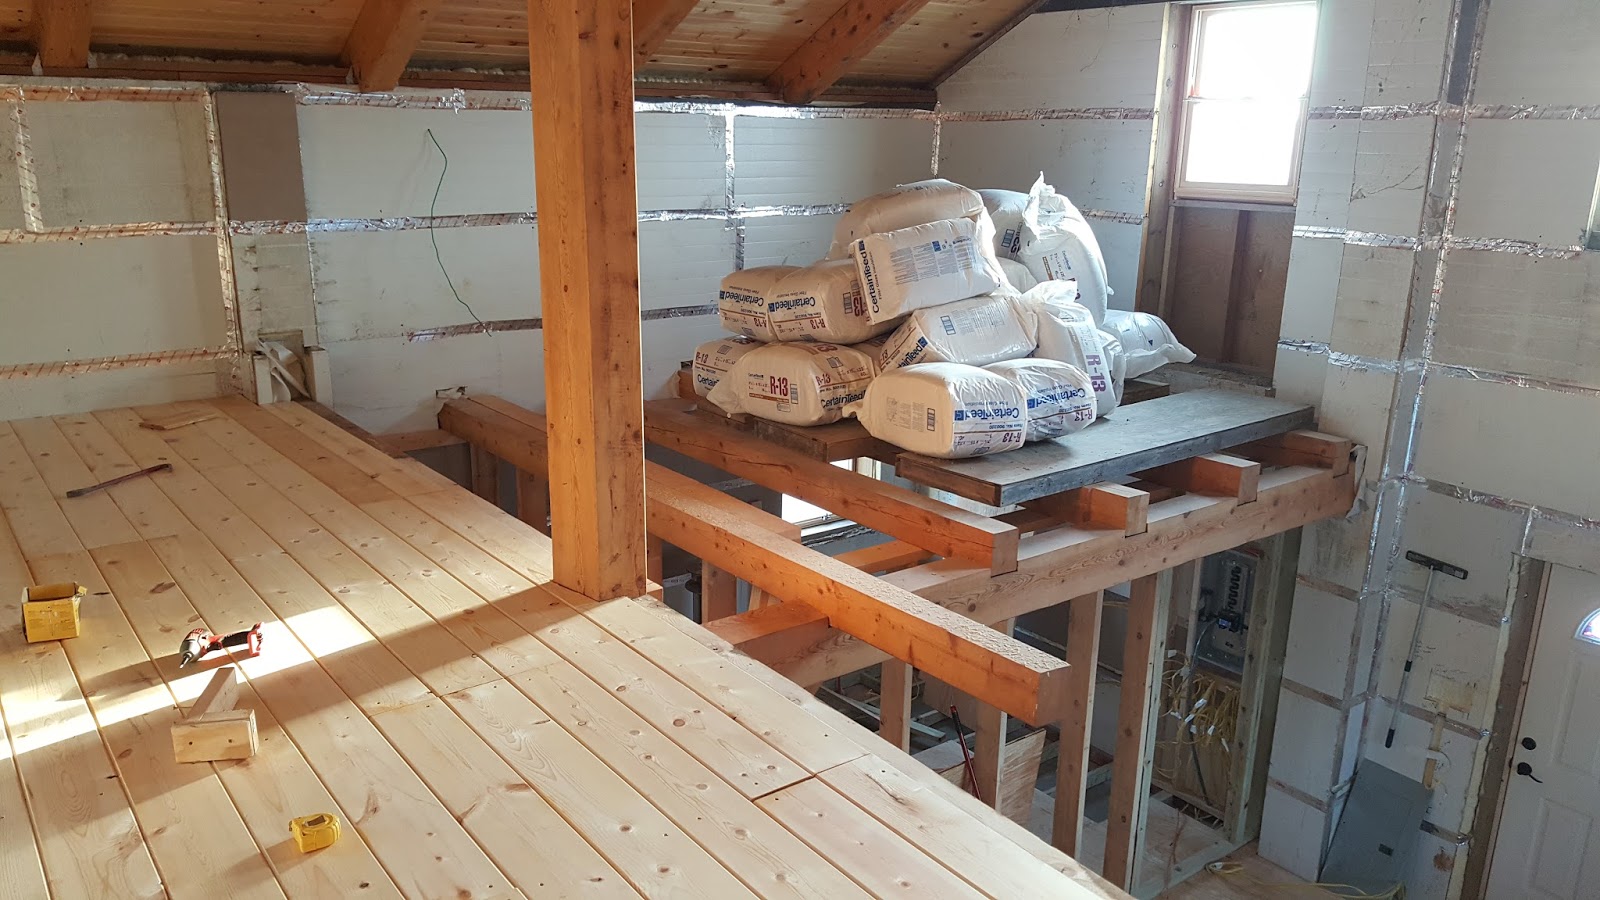
It has been a busy 3 weeks since our last post.  First, we finished the floor in our side of the loft with car siding and garage doors.  It was a hard 2 day job with Jeremy and the kids (and a little help in the evening from me), but it turned out great!
The view of the other half the loft in the middle
of framing the kids bedroom walls.


Then we moved on to more framing.  First, we framed the walls around the bathroom so that Scott could get the electrical and plumbing going there.  Then we did the walls upstairs around our room and between the kids rooms.  It was so awesome the first time we could stand in the space and actually see the walls!

Completed upstairs interior framing

We weren't done framing yet though.  All of the exterior walls have to have boards attached as a fir wall to mount the final wall covering to.  That process took a while.  We also had to cut channels in the garage doors for any wires that had to cross studs since the fir wall is only 1.5" deep. 

Fir wall in Jacob's room

We also had to do the pocket door for the bathroom.  It was the first time we had every done a pocket door and it was, thankfully, not too bad.  That finished the last of the bathroom framing!

Pocket door!
 
While we worked on that, Scott worked on the plumbing.  When he assembled the vent stack, I got to climb up on the roof to do the roof cut and seal.  Did I mention that I hate heights?  It was actually ok.  Having the scaffolding available to set up and Jeremy there to help hand stuff up to me made it so much easier.  We also discovered that rubber cement painted on the soles of tennis shoes gives great traction on a metal roof!  That will come in handy since we have a couple more trips onto the roof to make before we're done (water heater vent and finishing the chimney).

Working on the washer drain
 
With the fir walls finally done, we started insulating the exterior walls.  The rigid foam insulation both boosts the walls to around an R35 and gives some extra rigidity to the drywall since we built the fir wall on 24" centers.  It does take some time to cut it to fit for each cavity though.  We aren't quite done with that step yet.


Meanwhile, Scott has gotten almost all the water lines in!  We finally got to set the tub in position permanently this week. 

There's a bathtub!  And we don't have to pick it up again!
 
Technically, we are ready to start hanging drywall in all the bedrooms and the upstairs bath now.  Talk about an exciting feeling!  We still have to finish insulating and doing the last couple of runs of electrical in the walls before we can button up the downstairs though.

First sheets of drywall are on site!
 
Lastly, Jeremy began trimming out all the windows and doors this week.  They are looking great!  More importantly, this is the last step before we can submit our "finished house" pictures to the county to get our certificate of occupancy. 

Finished east door

As always, the work continues day by day.  Each day there are small milestones - a washer drain is done, a door is trimmed, a new section is insulated - and over time it adds up to real progress.  It is a long slow process though.  Each new milestone feels great, but there are still so very many of them to get through.  Every day, little up.


Tuesday, June 20, 2017

We have (interior) walls!

Picking up where we left off...

Once the gas line and all the electrical runs were in the floor, we put down the rest of the subfloor.  It was heavy and slow work, especially the parts I did by myself.  A 4x8 sheet of 3/4" plywood is rather heavy!  We had to leave one corner open because in the process of building the stone walls we managed to break a drain pipe in the slab.  We had to repair it before we could finish the floor and, naturally, the repair required a mail order only part, so that corner had to wait an extra week. 

Subfloor except for the broken pipe area

We kept going though!  Over the weekend of June 10th, Jeremy and Scott framed and installed the 2 downstairs walls.  The bathroom, laundry space and a storage space all go into that corner and the electrical was held up until it was installed.  As with all the other parts of the house, Jeremy and I changed our minds about exactly where the walls were going the night before they went up.  LOL. 

Scott assembling the wall

Jeremy standing the wall up while I attach it to the south wall

The finished corner room

Jeremy spent all day on Monday leveling the floor joists on the east end of the loft so that we could put down the car siding that makes the ceiling in the dining room and kitchen and the subfloor for the kids' rooms.  He finished it up on Tuesday morning, then we started laying floor on Tuesday evening.  By the end of the week, we had the subfloor in and the garage panels installed and it felt like a real loft!  Catherine was enjoying 4H camp, so Jacob was clutch on getting the garage doors and car siding installed.  I don't know what we would have done without him. 

View from the kitchen of the new ceiling on Tuesday night

Subfloor in the loft

The finished and the unfinished loft areas

One problem we had to solve was how to support the dividing wall between the kids' rooms.  It falls directly between 2 floor joists.  We didn't really want it to just be resting on the subfloor and garage doors, so Jeremy and Jacob imbedded wooden sleepers in the garage door layer that span the gap between joists.  This way the weight of the wall will be supported on the sleepers which are supported by the joists.  Problem solved!

Sleepers in the floor
 

Jacob with his loft


The parts arrived to fix the drain on Wednesday and I did the repair on Friday night.  We already had the subfloor cut and ready to go, so it only took an hour or so to get it all closed up and ready for us to finish the first floor framing (except the tall living room bay).

Finished subfloor corner


This past weekend, we did a lot of divide and conquer.  Jeremy and I and the kids worked on finishing the frame out in the bathroom so that we could be set up to do the loft floor for Jeremy and I's room.  We also decided to turn what was going to be our closet into a half bath instead.  It will be nice to not have to go downstairs in the middle of the night.  That does add to the complexity of the plumbing rough in though.  Scott is taking the change well, thankfully. 

Speaking of Scott!  While we worked on framing, he worked on the electrical panel.  He got all the floor runs tied off and then started pulling wire through the downstairs walls for the kitchen and bathroom.  It was a very productive day all the way around.

Scott and his panel


Sunday, Jeremy and I enjoyed a very pleasant, 80 degree Father's Day working on the house.  LOL.  Jeremy got the joists on our side of the loft leveled for floor and I framed in the front wall of the kids' rooms.  Then, around 4 we went to town to buy all the stuff for the bathroom.  A tub, surround, vanity and toilet later, we have a bathroom sitting in boxes in the (will be) living room of the house.  It was an expensive day but felt really good to be buying finishing stuff finally.

Kids room front wall upstairs


This week, we are pushing toward getting the walls up around the downstairs bathroom so that the final plumbing and electrical rough in can happen this weekend.  Jeremy and the kids are also putting down the car siding in Jeremy and I's room and then the garage doors.  It's really starting to look like a house inside!


Wednesday, May 31, 2017

Roof is done and moving inside...finally

I realized I forgot to mention in the last post that the 3 layers of garage doors are all locked to the timber rafters with 10 or 12" screws so that they can't delaminate and blow away.  That is particularly important since the metal roof is only screwed into the garage doors, not the timbers, which presents several other interesting challenges.  First, the wood screws that it comes with don't work on the metal faces of the garage doors, so we had to get different fasteners.  Its a hidden faster roof, so no one else will know about the substitution.  Also, the tar paper doesn't adhere to the metal as well as it does to wood, so when the sun gets hot in the middle of the day it starts to slide.  That meant that we had to quit early some days so that we wouldn't tear up the tar paper as we installed the roof.  Minor details, right?  The installation started with the north and south eaves.

The eave piece gets attached, then the soffit pieces slide into place from the end

Once both eaves and soffits were installed, we started putting the roof pieces on.  When I say "we" I mean mostly Jeremy.  I tried really hard to get on the roof and help but my fear of heights got me in a big way.  Instead, I ferried everything from the ground up to Jeremy for a long, hard weekend as he walked the roof.  Each metal piece had to be carefully aligned with the ones already on the roof which meant he had to be at the peak and I had to be at the eave to line it up and then tap it in place with a rubber mallet.  It was slow work, but it looked exactly the way we wanted when we were done!

Jeremy on working on the north side roof - he's my hero!


It took almost a full day to get the chimney box installed correctly and then cut the roofing panels around it.  The result is great!  The bucket (in case you're wondering) is to keep the rain out until we put the finished chimney stack on.


After the roof panels and chimney came the gable end pieces.  They wrap all the way around and then have soffit covers like the north and south eaves, so they took a bit of work to get right, but it looks great now.  Last came the ridge cap!  In the picture below, you can see the first 2 windows installed also.

Finished roof and windows!

The roof got finished on 5/10 just before a rain storm (note the grey clouds in the pictures above).  Next came buttoning up the rest of the outside which meant windows!  Luckily, there aren't very many of them in the house, so it didn't take too long to get them installed.  We also found 3 nice exterior doors at the Habitat Restore and painted them to match each other.  Installing them in our very non-standard house took a bit of work, but they look beautiful now.

Our front door!

The white house wrap you see will be covered with cedar siding made from the cedar trees we harvested at my uncle's farm in Arkansas and some we got from western Kansas at some point in the future.  For now, it sheds water so we moved inside.

In the in between time on the roof, Jeremy, Matt and my brother, Scott, managed to get the floor framed in and a section of subfloor installed so that we had a solid place to put things in the house.  Now we run into another unique challenge from the building method we picked.  The interior walls are only furred out (1.5"), not full studs, so any horizontal run of wire that goes through an exterior wall has to get routed into the garage doors.  Also, all the light switches and outlets have to get routed out because they need more than 1.5" of clearance in the wall.  Our answer?  Sharpies.  We drew all the wire runs on the wall with all the outlets and notes for what was supposed to go where, then Jeremy cut out all the channels and boxes.

Finished subfloor in the living/dining room and windows!


At that point, Scott could start pulling wire through the floor.  Again, since we don't have a lot of interior walls and horizontal runs take routing, most of the main power runs have to go through the floor and then vertically up the exterior walls. All the floor runs also have to go in before we can finish putting down the subfloor which has to happen before we can do the rest of the wall framing and....you get the picture.

Wiring in the floor and taped to the walls
Marking the walls
Wire to the panel - the only actual normal framed wall section in the house....

While Scott was pulling wire, I started on a section of wall framing on the existing subfloor.  The studs are 2x4's on their side that are screwed into the garage doors and to each other to make a solid wall system.  The window makes the picture a little dark, but hopefully you can get the idea.

The first stud wall! 

The other thing that has to go in the floor is the gas line.  Luckily, we know a master pipe fitter who volunteered to do the line for us.  Thank you, Dan Saunders!

Installing the finished assembly


So that brings us to now.  We have a few more wire runs to go in the floor this weekend, then we'll start closing it up.  It's coming together!